It’s getting frosty out there, and you will probably be cranking up the heat or lighting those fires any day now. While you’re getting all toasty inside your home, the last thing you need to worry about is your heat (and your heating costs) going through the roof – literally.
Have you checked your insulation lately? Does it need an upgrade, or just a basic install? Increasing the amount of existing insulation in your attic, or adding insulation where none exists, will keep your home cooler in the summer, warmer in the winter, and decrease your overall energy expenditures throughout every season.
It’s actually not hard to DIY, as long as you prep first and follow the basic steps.
Prepping is Key
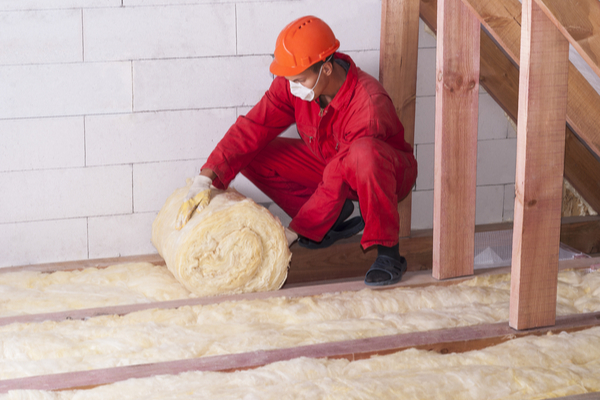
Measure the space between your joists with a tape measure so that you know how wide each length of insulation must be. Don’t forget to measure length either so that you can cut accordingly. Open the rolled insulation package by cutting lengthwise along the side with a utility knife, making sure that you don’t cut the insulation or any facing. Rolls need to be measured and cut to fit between your attic joists.
Take Proper Precautions
- Wear a respirator or protective mask: Dust and small pieces of fiberglass can easily break away as you are handling insulation, and if these fragments end up in your lungs, they could cause breathing problems or other respiratory trouble. If you have a commercial-strength respirator, by all means use it. In most cases, however, a smaller filter-style respirator or even a paper mask can be sufficient protection.
- Wear goggles or safety glasses: It’s also necessary to protect your eyes during an insulation project, so wear goggles or safety glasses to keep insulation fragments, dust and other material out of your eyes.
- Protect your skin: Wear long-sleeved shirts, gloves and other clothing that will protect your skin from exposure to insulation, which can cause itching and irritation. Put on work boots with good tread and wear a cap to keep insulation out of your hair. If possible, wear clothing that you can dispose of when you’re done with the project.
- Protect your knees: If you’ll be kneeling, wear kneepads to prevent bruising or injury. Put down a piece or two of plywood to create a flat working space over any exposed beams or joists in the attic floor.
- Time the job right: Avoid working in the attic when it’s hot outside; the attic space can get dangerously hot and possibly harmful to anyone working there, especially for someone not accustomed to being in high heat.
Install the Insulation
Unroll the insulation and place or push it into the spaces between joists. Make sure that the roll lies completely flat inside. You can then expand it so that it fills the entire space. The piece of insulation should be snug inside the space. If you’re using faced insulation rolls or batts, be sure that the facing faces the floor of the attic, i.e. the room below the attic for proper vapor retarding. You can staple the flanges of faced insulation to the joists.
—
Photo Credit: Kuchina / Shutterstock.com
